To start work on a code-base, you must first create a Structure101 project, specifying where bytecode for your project is located, and how you want to model it. Next time you open the project, Studio will re-parse the code in order re-generate the structural model for the (possibly changed) code-base.
The primary model properties for Java are as follows:
- Project type:
- Maven
- Discover bytecode using pom.xml files
- Structure101 Source Connector
- Create your project using a Structure101 Connector settings file (you will need to install the Structure101 Connector plugin into your IDE to create one of these - define the location in the IDE preference for the Structure101 Connector plugin).
- Eclipse workspace
- Searches recursively for .classpath files
- Static classpath
- A list of classpath elements for the bytecode in your project
- Excludes
- Externals
- Modules
- Granularity
- Source files
- Transformations
Once you have created a project, you can edit these settings (other than Project type) at any time via the menu item Model / Properties.
The project classpath specifies where your .class files are located (Structure101 Studio parses byte-code, not source).
Occasionally, you may want to point at a jar file (or classes directory) but not include all the class files it contains. The most common scenario here is where you wish to exclude Test classes. You do this by specifying Exclude patterns. For example, *.Test* will exclude all classes whose local name begins with "Test" (see Transformations for more detail on pattern-matching).
In general, you should only point at the jars or directories that contain the "project" code (and omit the runtime and/or third-party libraries that are needed to run the code). By default, Structure101 Studio automatically ignores references to any classes that fall outside the project scope - this is usually what you want (the fact that all classes depend on java.lang.Object is rarely of interest). You can change this default behavior by switching on the Show externals option. This allows you to see all the external dependencies in your code, for instance to track down all code that makes direct database calls (depend on java.sql).
The reverse-engineering process discovers all the dependencies between all classes and class members. However, you can choose whether you want to view the resulting model in detail or normal granularity. Normal granularity stops the model at the outer-class level. This is particularly useful when working with limited hardware and trying to load in extremely large projects. However, it can also be very useful in any other scenario where you would like to reduce load times (e.g. experimenting with classpath settings, excludes or transformations).
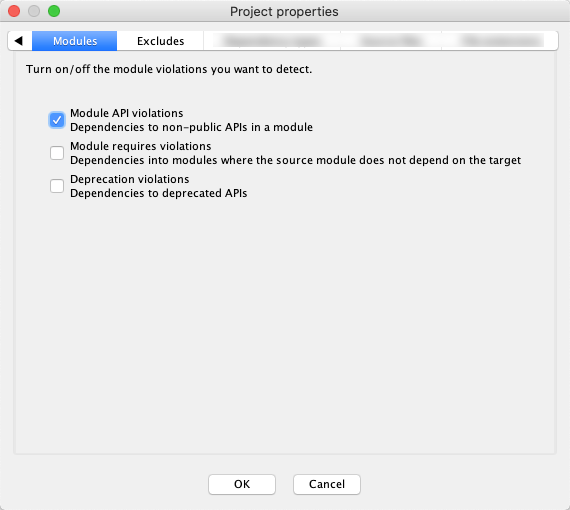
On your project properties dialog, you will see a "Modules" tab. This lets you select which kinds of module violations you wish to be detected. For example you can define module APIs and have them checked, but not require the module-to-module control (yet).

If "Module API violations" is enabled, then module A can only use the subset of code that is in a "public" region of module B. (Containers can be defined as public using actions on the module sub-menu of the LSM context menu).
Setting "Module requires violations" means that module A can only use any code in module B if there is a direct dependency from the module A node in the LSM onto the module B node. (To add a "requires" dependency, select both module A and module B in the LSM, right-click, add/dependency from A to B).
Setting "Deprecation violations" will cause every dependency onto a deprecated item to be considered a violation. Note that this is in fact independent of the enclosing modules. (The "deprecated" attribute
Note 1:
Where you require to show a needs to compile edge between components indirectly connected, you can add the following to your application .ini file (usually located in user-home):
[java-settings]
show-needs-to-compile=true
And this is then recorded in a new, saved project file as:
<property name="show-needs-to-compile" value="true" />
A project file setting, if any, will always override ini setting, and can be set to false to hide these edges. If you remove the project file setting it reverts back to ini setting, and if ini setting removed also then these edges are not shown. The default is that these edges ARE NOT shown, so you will need to add .ini file option to show them.
Note 2:
Artifacts such as Actions and Specs are applied after the above settings have been applied, and are also saved as part of the project.
Note 3:
To see spring dependency injection make sure the bean definition xml files are on the classpath.
Note 4:
Use the "Source Connector" project type to load a model that corresponds to your IDE workspace. You will need to first install the Connector in your IDE and specify where the "settings file" (*.hsw) is to be stored. Then indicate this file as part of the Studio settings.