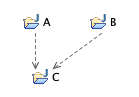
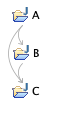
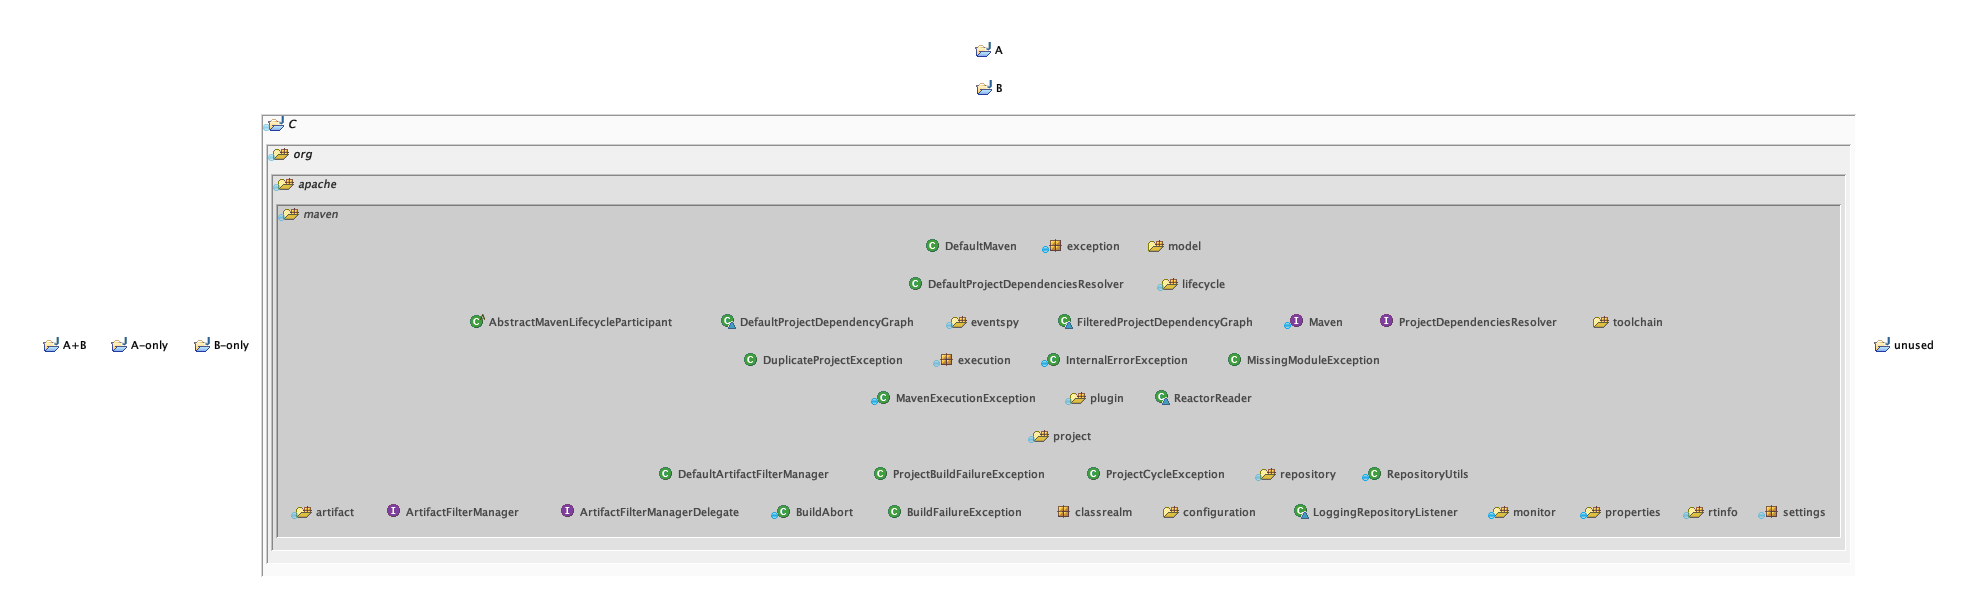
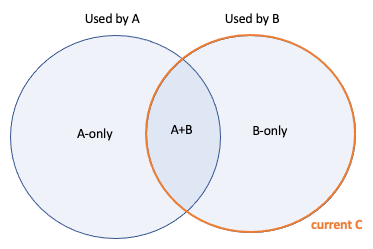
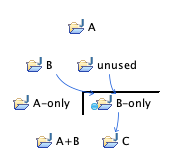
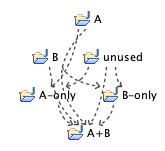
This is a scenario that I’ve been asked about by several Structure101 users. module C is used by 2 other modules A and B, and we’d like to split module C into 4 modules based on how classes are used by A and B:
- A only
- B only
- A and B
- neither A nor B
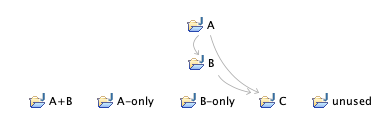
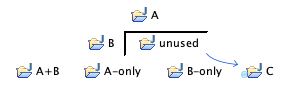
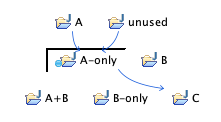
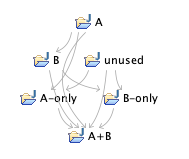
In other words we want to transform this:
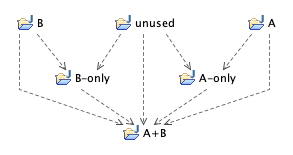
… to this:
This post outlines the steps for this using Structure101 Studio v6. The steps here cover just the manipulation of the Structure101 model of your code base. You will be creating one or more action lists that will tell you (or assignees) the exact steps to perform on the code.
The example I’m using is a Java project – the same steps can be applied to any other language supported by Structure101.
Walkthrough
This video walks through the same steps as outlined below.
Setup
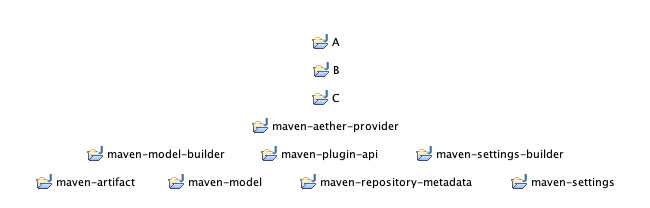
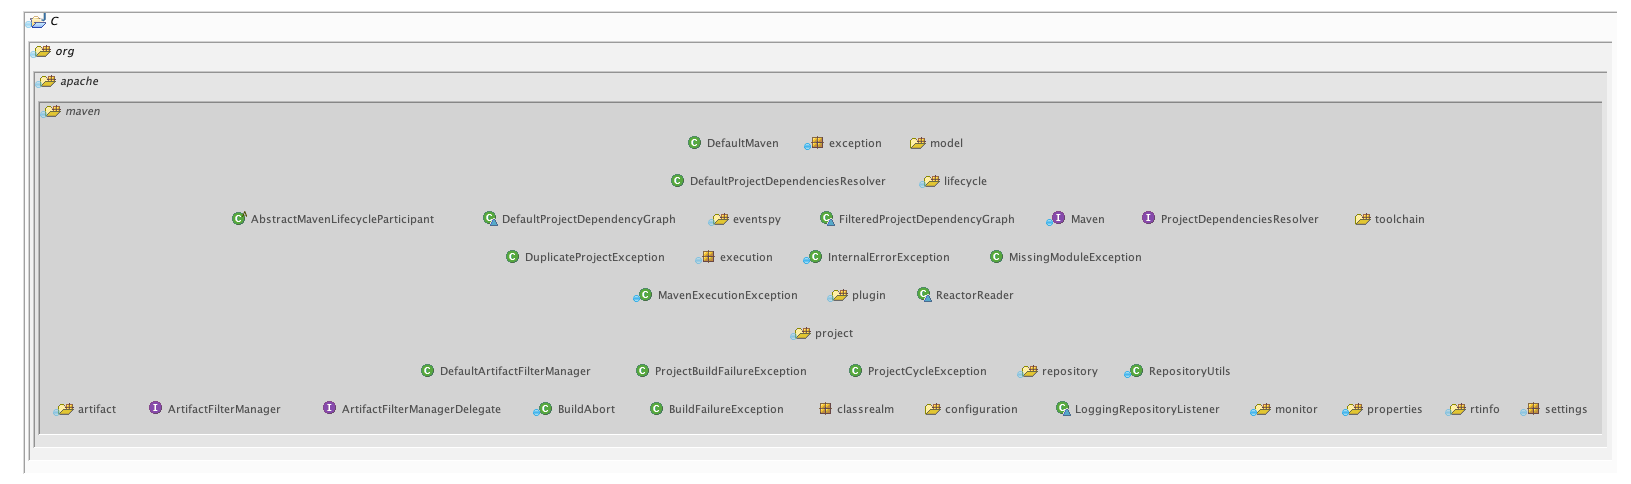
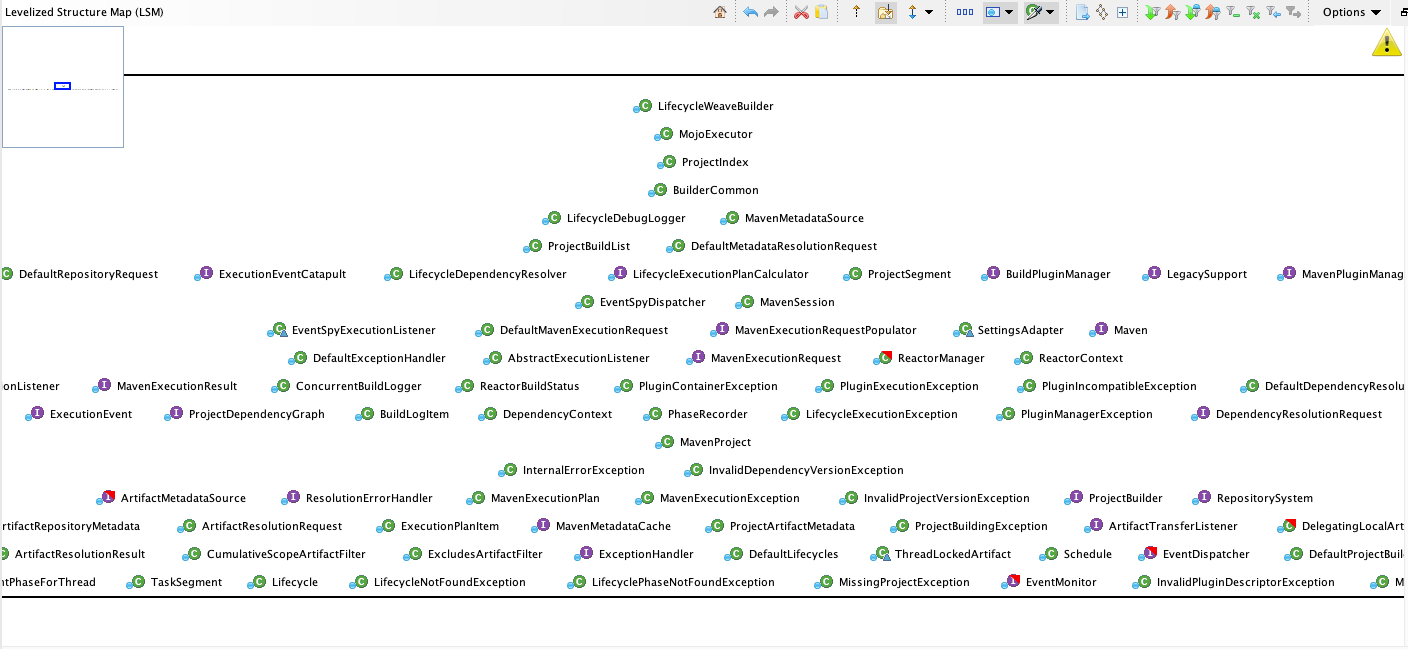
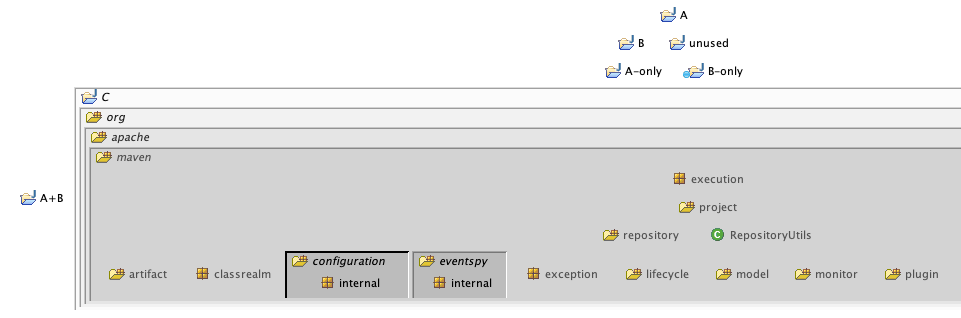
I’m going to use (a version of) the Maven open source code for the example, which at the top level looks like this in the Studio LSM:

When I create this project, I set the “granularity” option to “Normal”:
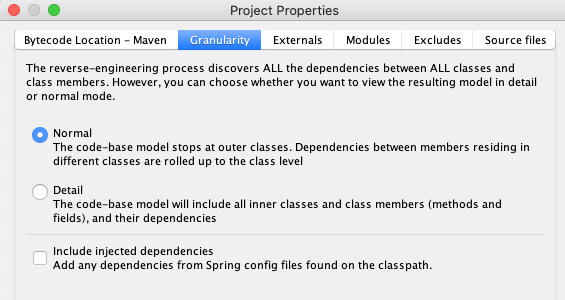
(This is an important point when chasing dependencies – subject for another post…)
To make it easier to follow along, I’ll rename the top 3 modules to A, B, and C (context menu or F2):
(If you’re doing exactly the same steps on your own project, you might want to rename your own modules to A, B, and C temporarily (remember this affects the Structure101 model only) and then change back to the correct names when you’re finished.)
Now as we’re only interested in A, B and C for now, I filter out the other modules (multi-select A, B and C, and context/filter-in). I’ll also select the “show all dependencies” option (LSM tool bar):
This is slightly more complex than the simplest case in the intro, in that while A and B both use C, A also uses B. This is often the case so I’ll continue with the example as it is.
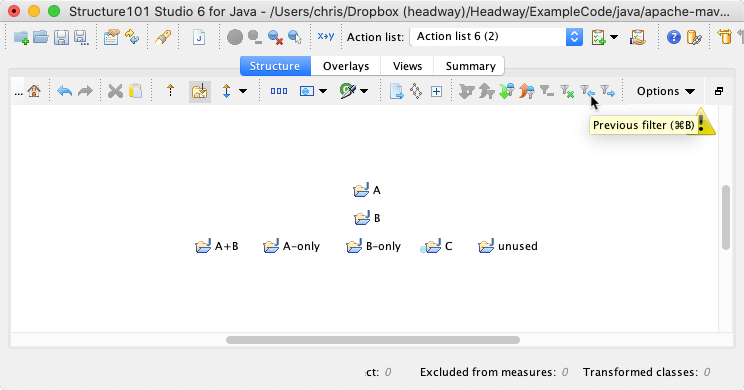
Create the new modules
Using the context menu on the whitespace around the existing modules…
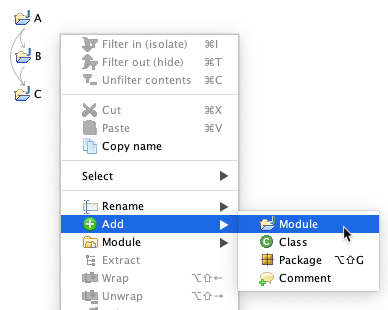
… create each of the 4 new modules:
At this point the new modules are empty, so there are no dependencies to or from them.
Move the “unused” classes
(I’m going to use a sequence of steps to move a specific set of classes (based on their dependencies with classes in other modules) into a new module, whilst retaining their fully qualified (package) name (so no Java code changes will be needed!). These steps are basically reused in the following sections, and can be adapted as needed.)
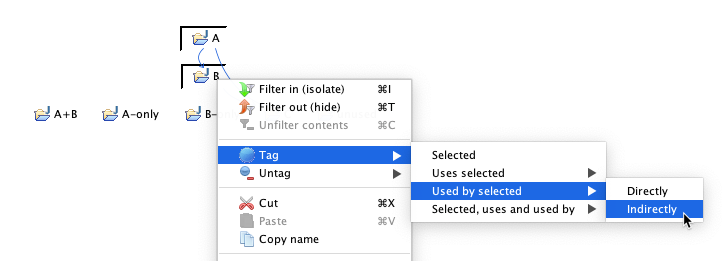
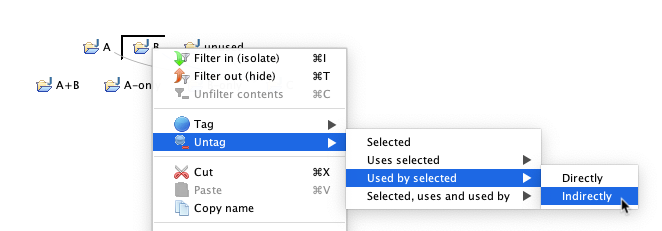
First we’ll tag the classes in C that are used by any classes in A or B. Select A and B (cmd-click to multi-select), and tag all the classes that are used by either (right click, tag/Used-by-selected/Indirectly):
This causes a pale blue dot to appear on module C, indicating that it contains some tagged classes (i.e. classes that are used by A and/or B):

Expanding C (double-click) shows all the items (levelized) that are contained by C:
The tags (blue dots) indicate which items are used. (We could drill down into tagged packages to find out which classes within them are tagged.)
We want to grab all the classes that are not tagged, and move them to the “unused” module. Searching (by browsing) and selecting and moving all of these could be a tedious process – but there’s a short cut…
First hide all modules except for module C (select, right-click, filter-in/isolate):
… the other modules disappear from the LSM. Now select the Class Slice on the viewing options toolbar:

This now shows all of the classes (levelized) in module C without the enclosing package structure. And the the tagging (i.e. “used by A and/or B) is preserved – the tagged classes have a blue dot.
Now it would be a bit easier to find and select each tagged class, but again this is tedious for more than a few classes.
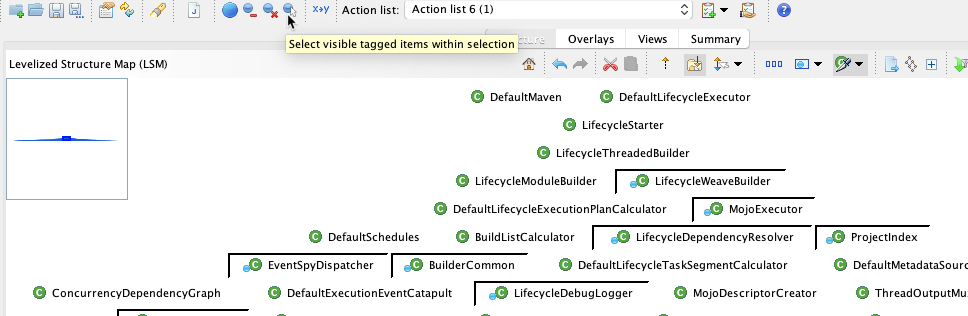
There is a button to select all tagged classes (main toolbar):
But actually what we want this time is to select all the classes that are not tagged (i.e. not used by A or B), so we’ll use another button to “Auto-group tagged items”:
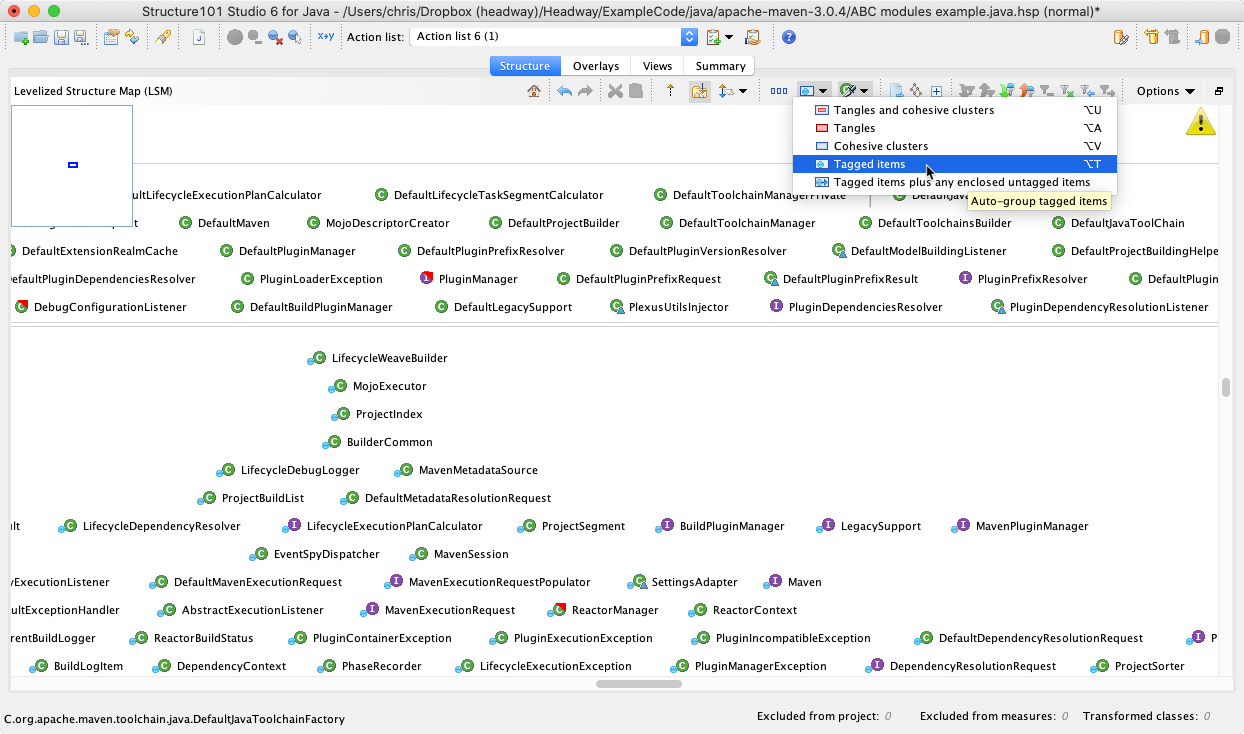
This arranges the items into 2 groups, tagged and not tagged. It’s easier to see what’s going on if you collapse the groups (double-click in the whitespace in each group, or right-click/expand-collapse/collapse-all):

So we can see that there are 156 untagged (not used by A or B) classes and 142 tagged (used by A and/or B) classes (and that some of the former use some of the latter). More importantly this gives us an easy way to select (click) and cut (right-click/cut) the unused classes (the untagged group):

This removes all the unused classes from module C and puts them on the clipboard, and all we see in the view are tagged classes:
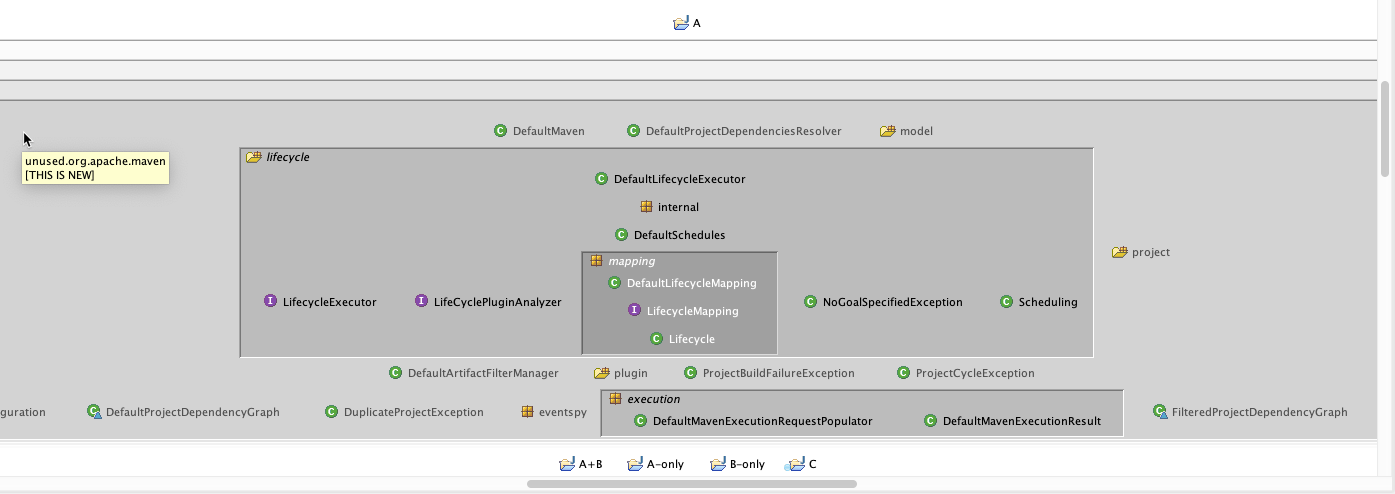
Now deselect the slice option (click to deselect the button) to add back the module and package structure to the LSM:

Not much to see here as we filtered on module C, so we click the “previous filter” button to show the modules we’re interested in (but not all of the modules):
Now we paste all the unused classes (that we cut from module C) onto the “unused” module (right-click/paste). Notice that “unused” has moved up a level because it now contains classes that use module C. And we notice that “unused” is indeed not used by either A or B:
… and if we drill into (double-click) “unused” we see that the classes have been moved there from module C along with their original package structure:
(This is the effect of moving or pasting things directly to a module in the LSM – e.g. if you move/paste to a package within a module, then the original package structure is discarded and the target package becomes the new home).
Move the “A-only” classes
Now we use basically the same technique to move the next group of classes out of C.
Having removed the unused classes, C now contains only the classes that are used by A and/or B:

If we remove all “Used by B”, we will remove both the “B-only” subset and the “A+B” subset, leaving the “A-only” subset.
After the prior step, all classes in C are currently tagged. So to capture the classes that are used by A only, we simply need to “untag” the classes that are used by B (right-click on B, untag/used-by-selected/indirect).
Then we filter on C, go to the class slice, cut the remaining tagged classes, deselect the slice, back to previous filter, paste onto “A-only” module:
… and A (and not B) uses A-only, as expected.
Move the “B-only” classes
At this stage, C contains some classes in subsets B-only and A+B:
So we’ll extract the B-only classes in the same way that we extracted the A-only classes. We’ll tag all classes, then untag “Used by A” leaving the B-only subset tagged.
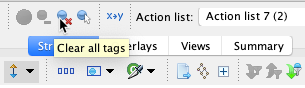
First clear the tagging (from prior step) from the main toolbar:
Then tag all the classes in C (right-click on C, Tag/Selected), and untag the classes used by A, so that the remaining tagged classes are those used by B only. Then filter-in/isolate C, Class slice, group tagged, cut tagged, remove slice, filter back, paste onto module B-only:
Move the “A+B” classes
Now in fact the classes that remain in C are just those in the A+B subset, so we could just rename C to “A+B”. However if we look inside C:
… we will see that there are (usually) a number of empty packages – when we double click on an empty package, nothing happens because there’s nothing to see inside. An empty package is not a meaningful thing in Java, but Structure101 does not automatically delete these because packages are often empty during restructuring activities, and you may or may not want to move classes into them later. So it’s up to the user to explicitly remove empty packages.
If C was a fairly large package initially, with a deep package structure, it is easier to follow the slice/cut/unslice/paste technique again, and move the remaining classes to a new module. After this, C will just contain empty packages, and can be deleted.
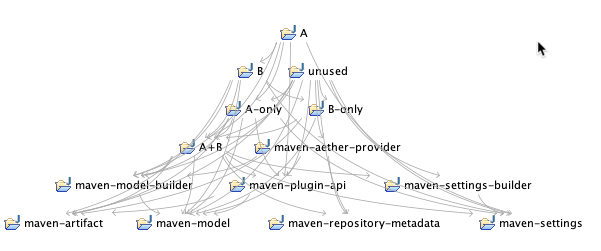
So we do that (filter-in/isolate C, class slice, select all classes, cut, unslice, filter-back, past onto module A+B, delete module C). In the following screen shot I have also clicked on the “Show dependency graph viewer” to pop up a clearer graph:
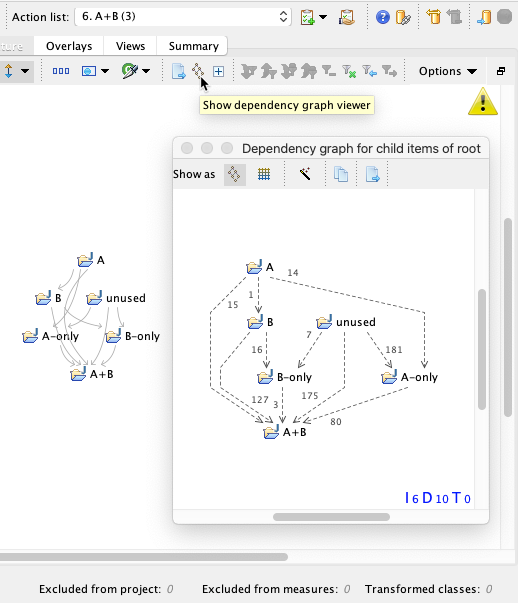
At this stage the classes are moved (in the Structure101 model) to the new locations and the dependencies between the modules confirm that the result is as expected.
Adding the module dependencies
When we go to implement this new structure on the actual code-base, we will need to create the new modules, but also add any module-to-module dependencies, so that when we move the classes, the code can be compiled (by the IDE, Maven, Gradle, …). Structure101 gives us an easy way to find out which module-to-module dependencies are missing, i.e. where there are inter-module class-to-class dependencies for which there is no module-to-module “requires” dependency.
We do this in on the “modules” tab in the project properties:
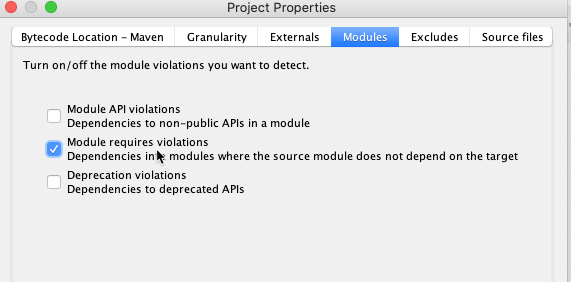
With this option selected we see any missing module dependencies highlighted (dashed/bold) on the LSM:
We need to add direct module-to-module dependencies between any 2 modules that have class-level dependencies, if those classes are to compile after they are moved to their new modules. The easiest way to do this is to explicitly “allow” them (multi-select the violating dependencies, right-click/module/allow). When we do this in the above, the module violations go away:
But remember we have filtered the model to just include A, B, and the new C-originating modules. If we clear the filtering:
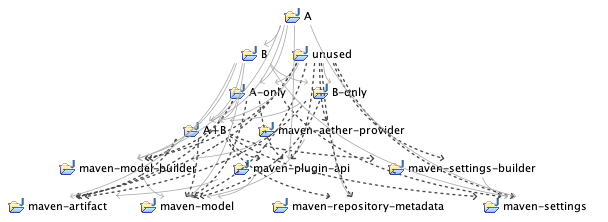
… all the required dependencies from the new modules to the ones that were filtered out appear. We need to “allow” those too (tip: you can multi-select from the “map-contents/dependencies” view under the LSM):
None of the dependencies are violations, and our model is complete.
Implementing the changes
Now that you have a target model with the classes that were in module C moved into the 4 new modules, you are ready to go do that to the code. How you do this will depend on how the work will be done and distributed – there are lots of options.
You can obviously just work off the model in Studio – create the new modules, module-dependencies, go to each of the new modules and see what classes need to be moved from C, and move them in your IDE. All the actions you performed on the model are saved in one or more Action Lists which can be exported, or shared with Workspace.
Also, when work has started on the implementation, you can reload the model with updated code, and any actions that have been completed will be greyed out in the action lists, so you can track progress.
The key is that you have created a concrete plan with a known outcome before you edit a single line of code. And not just that, but it is a plan that requires classes to be moved to new modules, but no actual java code to be modified, making it very low impact/risk, and preserving any APIs.
Leave a Reply